Control Panel Overview
Welcome to the Control Panel User Guide. This guide will help you navigate and use the features of our control panel effectively.
# Signing up for an account
Before you can access the Enable Banking control panel, you'll need to sign up for an account. Follow these steps:
- Visit the authentication page https://enablebanking.com/sign-in/ (opens new window).
- Enter your email, new accounts are automatically created on the first sign in.
- Follow the one-time authentication link sent to your email. After authentication you will be redirected your profile in the Control.
# API applications
From here you can create, edit and see all applications created by you, or shared with you. An applications status can be "active" or "pending".
# Registering an application
Once you have an account, you can register your application to obtain API access:
Go to the API applications (opens new window) page using the top menu of the Control Panel.
Fill out "Add a new application" form:
- Keep the Sandbox environment and the default option for creation of the application's private key;
- Fill in the name of your application (this name will be shown to end users when they will be requested to authorise sharing of their account information with your application or to confirm a payment initiated by your application);
- Enter URLs whitelisted for redirecting of end users after they complete authorisation of access to account information or confirm a payment.
Submit the form by pressing "Register" button. Your web browser will generate a private key for the application and it will be saved into your downloads folder. Name of the file will be a UUID assigned to the newly registered application (e.g. aaaaaaaa-bbbb-cccc-dddd-eeeeeeeeeeee.pem).
Please note: Your applications description and name are both shown to end users when authenticating. Once a production application is active, you can request application name / URL changes. We will be notified of your request and shall approve them if they seem fit.
# Context menu

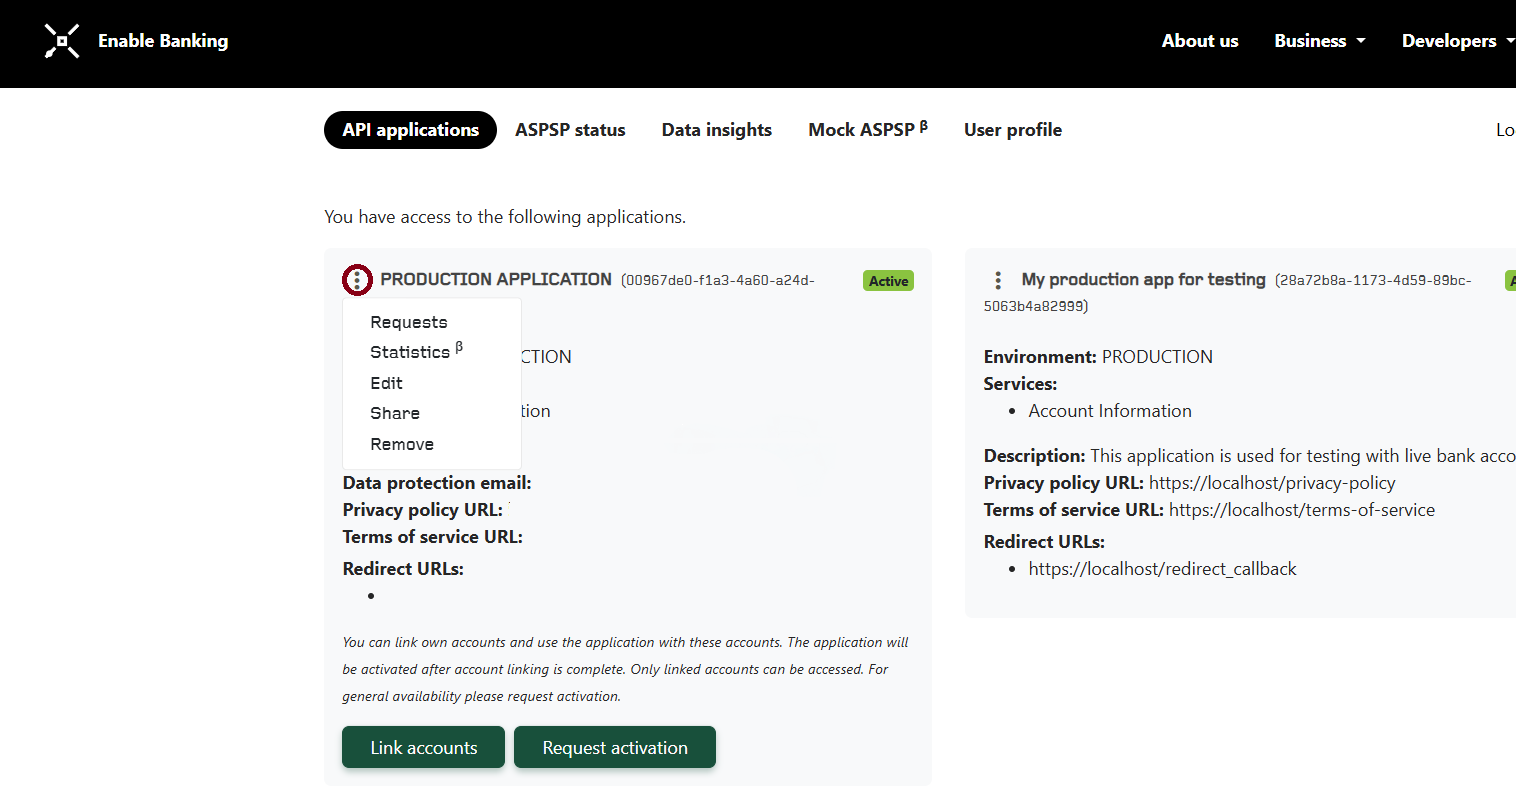
The context menu provides quick access to various actions related to your applications. Click on the three dots on the top left corner of your app to view requests, view statistics, edit your application, manage permissions, or remove your application.
# Editing an Application
- In the control panel dashboard, navigate to the API applications (opens new window) section.
- Find the application you want to edit and click on its context menu.
- Make the desired changes to the application details.
- Click "Save" to apply the changes.
# Request Logs

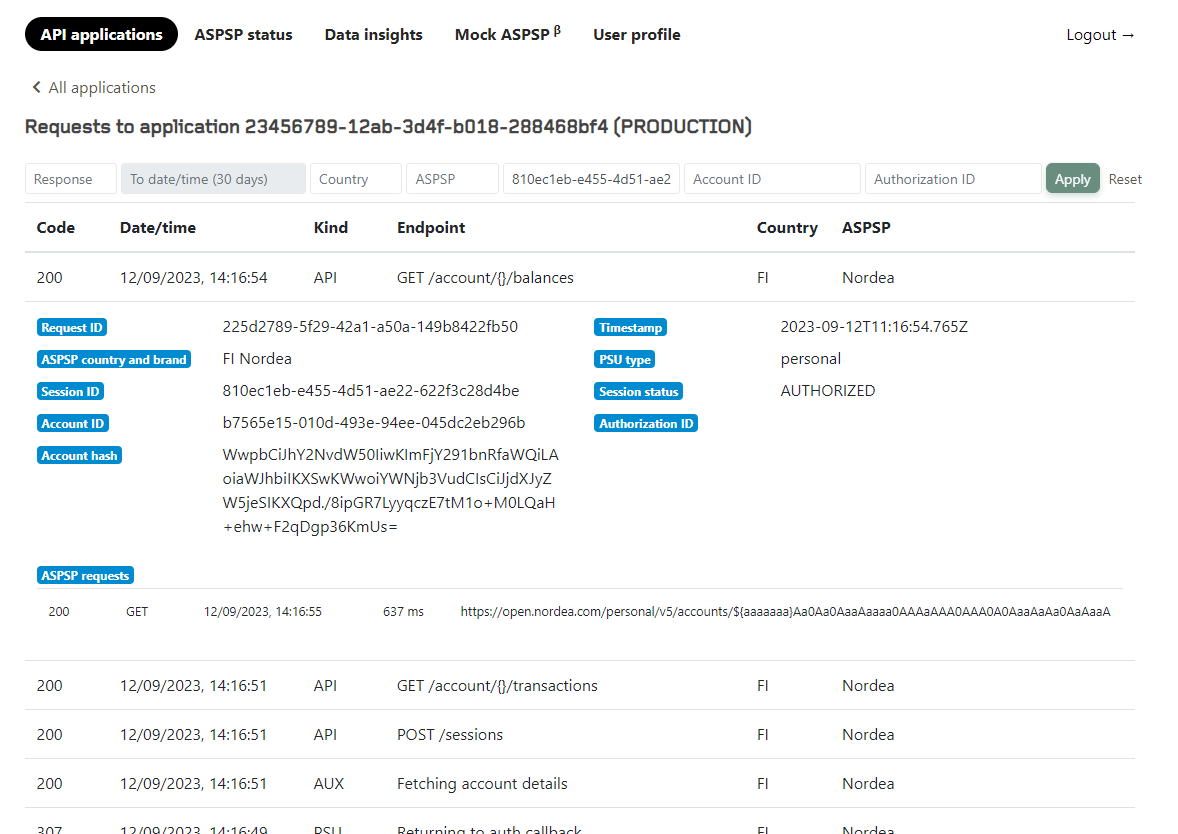
Request logs provide a detailed history of API requests made by your applications. You can access request by navigating to "API applications", clicking on your applications context menu, and selecting "Requests".
From here you can filter by response code, date, country, ASPSP, session ID, account ID or authorization ID.
When clicking on a request, it will show you more details that can be used to search for related details, or can be sent to our support for assistance.
About request details:
| Request | Description |
|---|---|
Request ID | The distinct ID of a request. |
ASPSP country and brand | Two letter country code and ASPSP name. |
Session ID | Unique ID assigned to a session |
Account ID | ID assigned for account the user is accessing. |
Account hash | ID assigned for account the user is accessing. |
ASPSP requests | Shows request details. |
Timestamp | Date & time of request. |
PSU type | Indicates whether the user was trying to access a personal or business account. |
Authorization ID | ID assigned to calls involving authorization. |
Session status | Status returned for last request. |
Learn more about session statuses.
# Application Statistics
For every ASPSP accessed by your application, you can now check the following statistics:
- Total number of sessions: Active sessions accessing account information during the selected period.
- Authorized accounts and sessions: Accounts and sessions authorized to access account information during the selected period.
- Unique accounts accessed: Total number of unique accounts accessed during the selected period.
- Total initiated payments: Number of payments initiated by the application.
- Successful payments: Payments with reached ACSC or ACCC status.
Unique Payment Services Users (PSUs): Users for whom the application initiated access to account information or payments.
You have the flexibility to order each column for easier access to the information you're searching for.
# Activation of Production Applications
General info (requirements):
The application will be reviewed by our personnel and assigned to your company's billing account. Before requesting unrestriction, please ensure that your company has a contract with Enable Banking in place and that the “Know-Your-Customer” verification has been completed. If not, please contact our sales team at info@enablebanking.com.
Before a contract for production usage of Enable Banking API has been signed, you may link your own account for testing real-life scenarios.
# Sharing Application Access
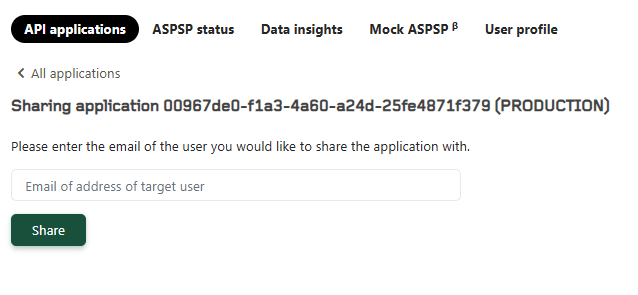
You can share application access with another user who has registered an Enable Banking account by adding their email used for regirstration on the Enable Banking page. To do so, go to the click on the context menu, and share.

# ASPSP status
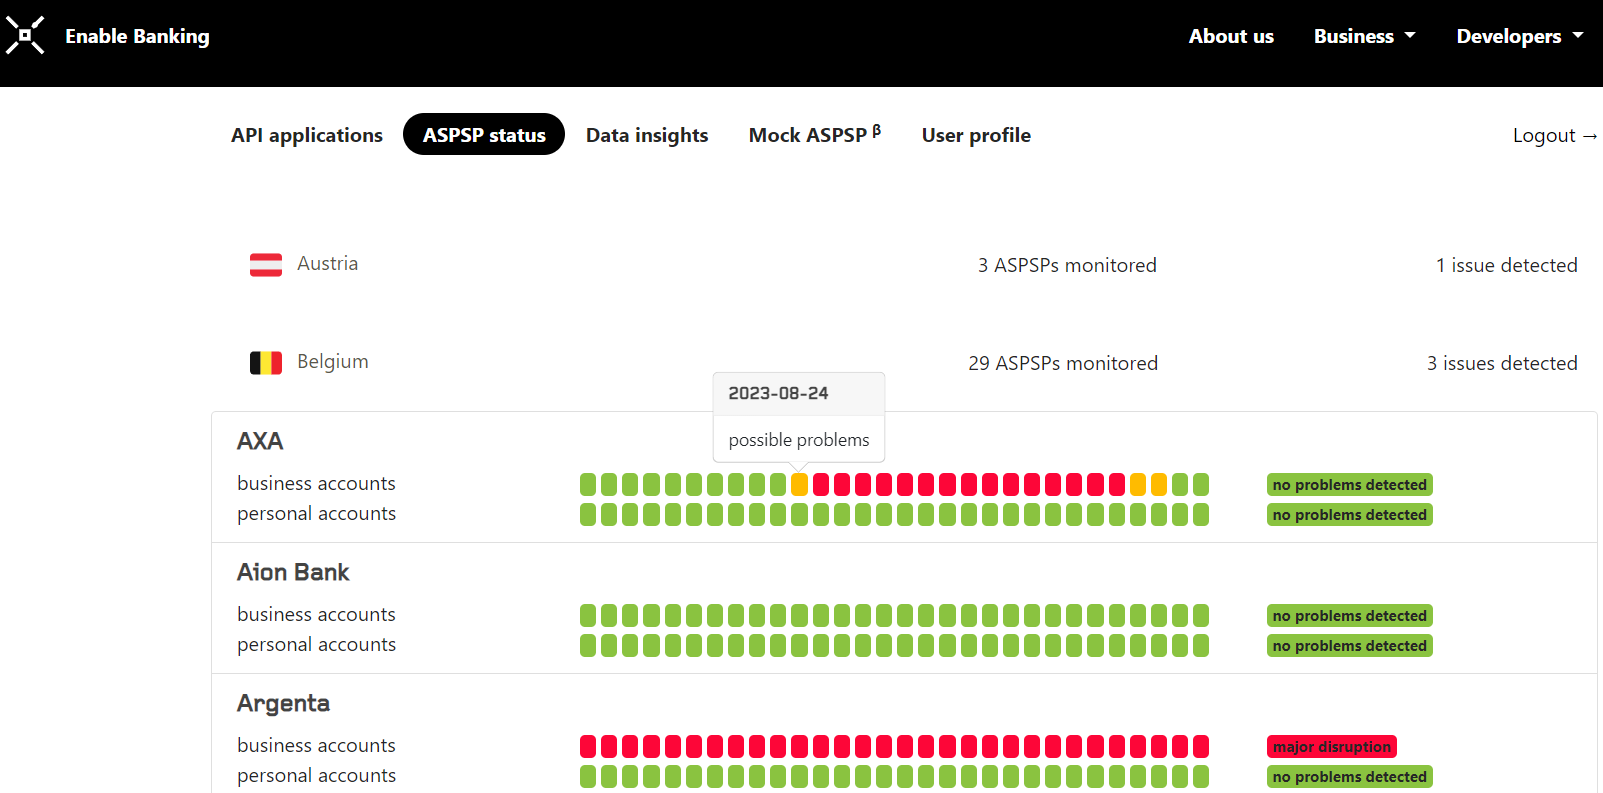
ASPSP (Account Servicing Payment Service Provider) status indicates the availability and status of financial institutions. It helps you understand the current status of ASPSPs based on statistics.

ASPSPs are sorted by country. Clicking on a country will load data for all ASPSPs available, along with 30 days history. There are three possible values.
| Value | Displayed when |
|---|---|
no problems detected | over 90% of requests are successfull |
possible problems | between 89 and 50% of requests are successfull |
major disruption | under 50% of requests are successfull |
Our current algorithms for monitoring the status of open banking APIs provided by ASPSPs under PSD2 incorporate authorization success rates. This enables the detection of issues where data retrieval may function correctly, but authorization is failing..
# Data Insights
The Data Insights (opens new window) feature of the Enable Banking Control Panel allows users to view the available data for each ASPSP, as well as what data is missing. It uses statistics gathered from the Enable Banking API, ensuring an accurate representation of the data landscape.
Data is presented as field name, field type (array/string/object), value (showing examples of responses) and presence (indicating percentagewise how often said field is populated.)
You can learn more about Data Insights by watching our video demo:
# Mock ASPSPs
Mock ASPSPs are simulated financial institutions that you can use for testing purposes. To learn how to use Mock ASPSPs, refer to our documentation.
# User profile
# Multi-Factor Authentication (MFA)
User Accounts now support Multi-Factor Authentication for user accounts. To enable MFA, log in to your Enable Banking account, go to the Profiles tab, and register your phone number to receive verification codes.
# MFA Requirements for Application Sharing
When sharing applications with other users, MFA is required to ensure consistent security levels. If MFA is enabled on your account, any user you share an application with must also enable MFA before they can access the shared application.
To enable MFA, click here (opens new window) and select "Enable". You will be guided through a quick process to secure your account and applications with MFA.